This is a sponsored post.
There’s nothing like the gentle melody of a wind chime to enhance your backyard experience. Whether mass-produced wind chimes don’t fit your budget, or you’re looking for a project, you’ll love these 3 DIY wind chimes for their look, their sound, and the fun of creating one for yourself. The best part about them is that you can up-cycle items you probably have around the house, giving them new life.
The Mason Jar Chimes

Source: Savedbylovecreations.com
For this fabulous wind chime, you will need the following:
- A bottle jar
- 2 eye screws
- One clear string
- Scrap wood
- Scissors
- Beads and other types of charms to decorate your string
- Bottle cutter
- Measuring tape
- A bucket of cold water
- One candle & lighter
- A rotary tool
This wind chime will transform your front porch into a fairytale land for both your kids and your guests. It will require a lot of patience and perseverance, but the results will be spectacular. Of course, if there are many other projects you can do besides the wind chime. For example, you can do a DIY mason jar terrarium with a minimum of effort.
Bottle Cap Wind Chimes

Source: trinaisartsy.com
After a summer BBQ, you might be inundated with bottles. Go ahead and recycle those (or find another up-cycle project), but save the bottle caps! You can use them to make DIY bottle cap wind chimes that can provide great sound and conversation. Here’s what you’ll need: bottle caps (and lots of them), metal wire, pliers, scissors or wire cutters, a hammer and punch or a drill, and a center piece–like a vegetable steamer.
Using either your hammer and punch or your drill, you’ll start out by making two holes in each bottle cap. Then you’ll make chains of bottle caps using the metal wire, pliers, and wire cutters or scissors. You can make the chains as long as you want, depending on how high you plan to hang your chime. Next, you simply affix the chains to your center piece and add some wire to the top to hang it. You’re done!
Tin Can Wind Chimes

Source: A girl & a glue gun
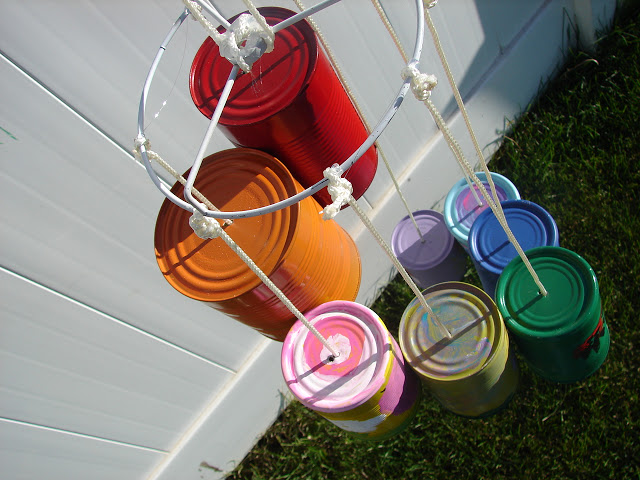
This is a great project to do with kids, as it’s fairly simple and they’ll love painting the tin cans and tying them together to make the chime. To make these tin can wind chimes, you will need the following items: tin cans, spray paint in whatever colors your kids like best, a hammer and nails, string, a candle and matches, scissors, and some type of circle to hang the cans from. This is a great tutorial, but you might want to use the hammer and nails, instead of handing those over to your kids.
You’ll use them to punch a hole in the bottom of each painted can. Then, simply thread the string through and tie a knot large enough so that it won’t slide through the hole. Depending on the type of string you use, you may need to burn the end of the string to keep it from fraying; this should be done only with adult supervision. Tie the other end of the string to your circle–in this tutorial, the circle is up-cycled from the top of a lamp (the piece that holds the lamp shade). Use a piece of string to hang the chime.
Kids will love that they can also decorate the cans with paint or stickers, adding a fun and personal touch to this up-cycled chime. The cans can also be sprayed or painted with a protective layer if you’re concerned that the weather will remove the paint. Of course, a weathered look might be just what you’re after!
No matter which DIY wind chime project you choose, you’ll have fun making these up-cycled projects that will add music to your porch or backyard. Taking something that would have been trash and transforming it into something beautiful is not only fun, but it’s also a great lesson for kids–and adults–to learn. Why buy when you can create? Enjoy your one-of-a-kind, new-to-you wind chimes!
Olivia Gillmore is a DIY and crafts blogger who loves to come with helpful tips for everyone. She graduated from Art Center College of Design, California and now she is a contributing editor to DIYExperience.com


